INSTALLATION INSTRUCTIONS
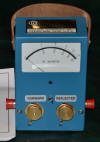
FOR THE LIGHTING SET in a bird 43 or similar meter.
DO NOT worry about the length of the
instructions. I stated every small detail even the very obvious.
If you can use a screwdriver YOU CAN DO
THIS. I hade my 17 year old read and install one then, the real test, my wife
did an install....100% no problems.
WARNING – The meter glass is
fragile and easily dislodged. One thumb on the glass will damage it.
The only requirement to drop this in involves the meter
type. It must be the newer style meter movement to work nicely. The set will
install over the older style but not as nicely. Also if you have a 43 with
three rubber bumpers keeping the meter away from the front of the case.….. they
will need to be replaced with foam. The foam is included with the
set no extra charge.
1. Unpack the lighting set – plug it in and make sure the shippers did not
destroy it.
a. Unplug the SET (DO NOT
INSTALL POWERED ON)
B. Verify you have all
the includes parts = a strip of foam and a tie wrap.
2. Remove the four or six screws holding the meter
back, remove the back.
a. Save these and ALL future
parts for reassembly
3. Gently place you meter face down on a solid work
surface.
b. If you
have a peak kit installed it is a good time to remove it.
4. Remove the two screws holding the meter movement
mounting ring.
a. Carefully lift the entire
meter movement and mounting ring assembly out of the meter. Do not separate
the ring and other items from the meter movement.
5. If the front of the
meter has stuck on foam skip this step.
a. place the meter movement glass up on the work surface.
b.
Remove the Three rubber bumpers from the three holes in the front of the meter.
c.
Clean any dirt or debris from the outer edge of the meter rim.
d.
Peel back a small amount of the backing.
e.
Starting at the top of the meter.. stick the foam to the black plastic meter
movement housing, removing the backing as you go, over where the three bumpers
were. Cover the entire outside rim cutting off any excess when the ends
meet at the top of the meter.
6. Slip the lighting set thru the element hole. Noting
the LEDs should be in the middle or towards the top of the mounting plate. Place the LED mounting
board across the bottom half of the meter opening. EXACT placement is not
critical. It will slide between the foam and cabinet.
7. Gently replace the meter movement in the case.
Install one screw in the meter ring. While holding to loose side of the meter
against the front of the case, stand the meter up. Prior to securing with the
second screw adjust the placement of the LED board. When position is close install the second screw.
Use the included tie wrap to secure the power cable to the line section (thru
the pre-tied loop. Tie wrap need not be completely tight as it is acting
as a strain relief in case you pull on the power cord.
a. If you are
installing / reinstalling a peak board now is the time to make it happen – with
the board installed hook up the power connection on the board, if that option
was purchased. For the PR90/100 the wire on the battery clip should be run
back between the contacts.
8. Plug it in and test it.
Verify the lights and power work as they should and correct the final placement
of the LED board. It should be just low enough to completely cover the
meter zero - lower is better. However the final placement is your choice.
9.
Replace the meter back and screws, install complete!!!!!!!!!!!
OTHER MOUNTINGS......
THE LIGHT SET CAN BE INSTALLED IN AFTER MARKET
ENCLOSURES.
HOWEVER THE BOARD MAY NEED TO BE TRIMMED TO ALLOW
FOR THE METER SCREWS THAT ARE NOT NORMALLY USED IN A 43.
INSTALL SHOULD BE:
mounting should be cabinet face
LED mounting board
foam stuck to meter rim
meter
Else you can glue the board to
the black meter surround but then it is permanent
![]()
![]()
